I have spent the last few afternoons down in a security rabbit hole that started with a certain someone complaining that my blog was reported as unsecure because it did not support HTTPS. As this rabbit hole is quite deep, I invite you to ensuring you have a cool beverage or hot cup of coffee close at hand if you decide to continue reading…
Context / Disclaimer / Justification
Publishing this initially via HTTP with no “S” was a design decision considering the historical security issues with SSL and TLS with my idea being keeping it simple with the least number of moving pieces that can introduce surface areas for problems. For this reason I loved the idea of Hexo creating a static website based on markdown, thereby avoiding any sort of DB backend for content or other complex implementations (yes i am looking at you Drupal, WordPress, and Joomla). What I did not realize was that publishing via only HTTP is seen as a security issue itself and when I began running online security scanners they were all raising risks for this so I decided that in addition to the other recommendations I would figure out how to publish via HTTPS to make them and Julio happy.
Please note that I reserve the right at any point to backtrack on this HTTPS decision and publish this via html v1.0 or v2.0 without any scripts or SSL to ensure maximum backwards compatibility (while playing with my Macintosh LC III in my Solstice Vacaction I tried a loading this blog on Mosaic 2.0.1 without much success (note to future self: provide photographic evidence here)).
Before and after
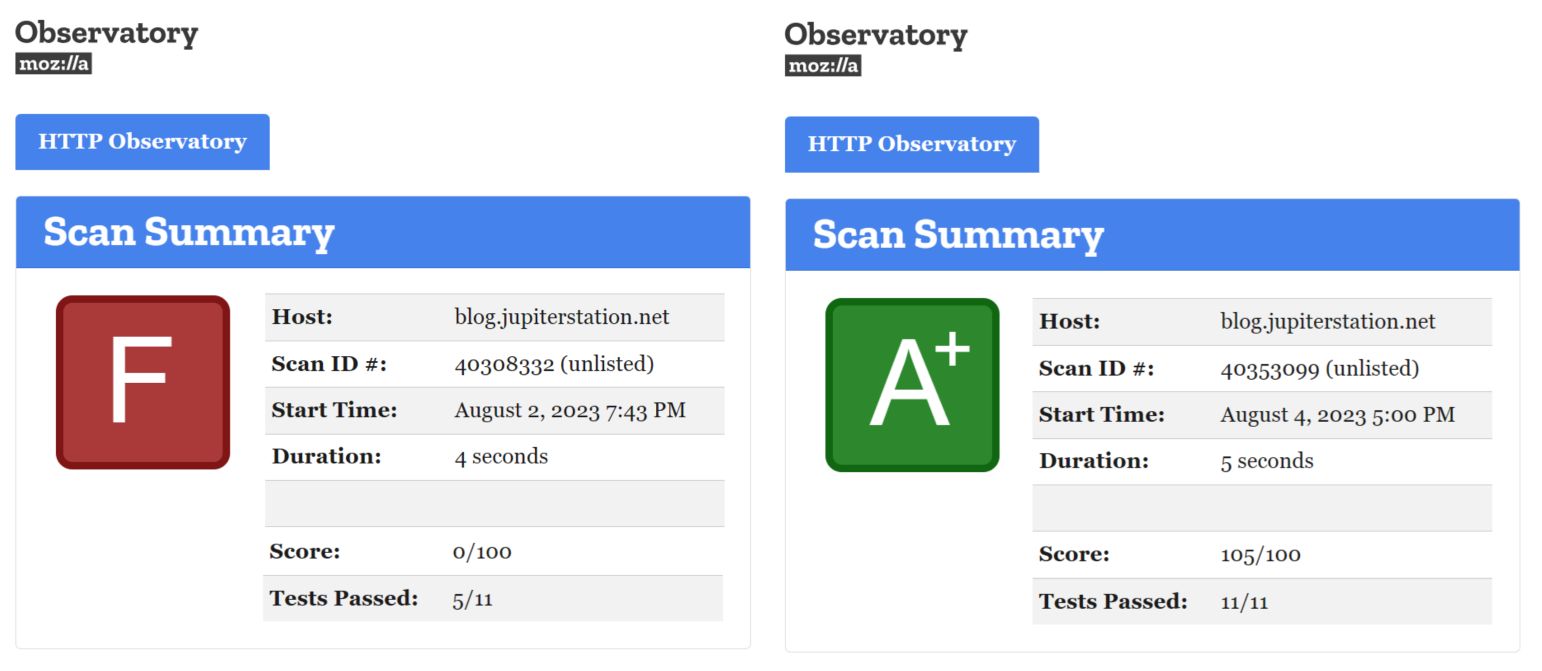
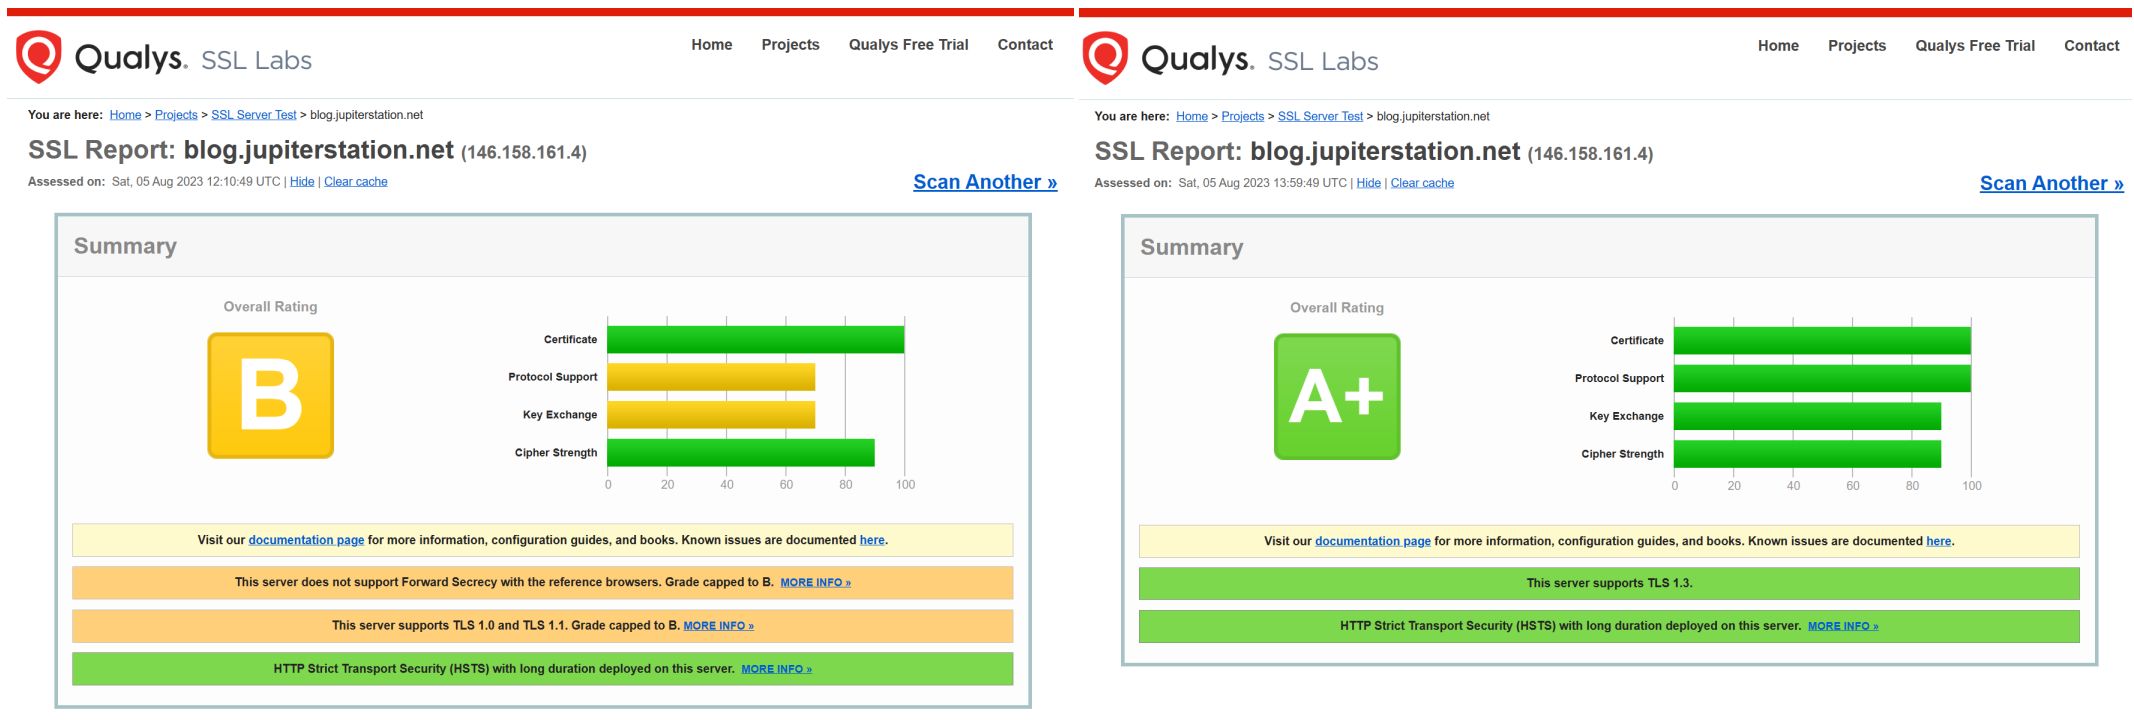
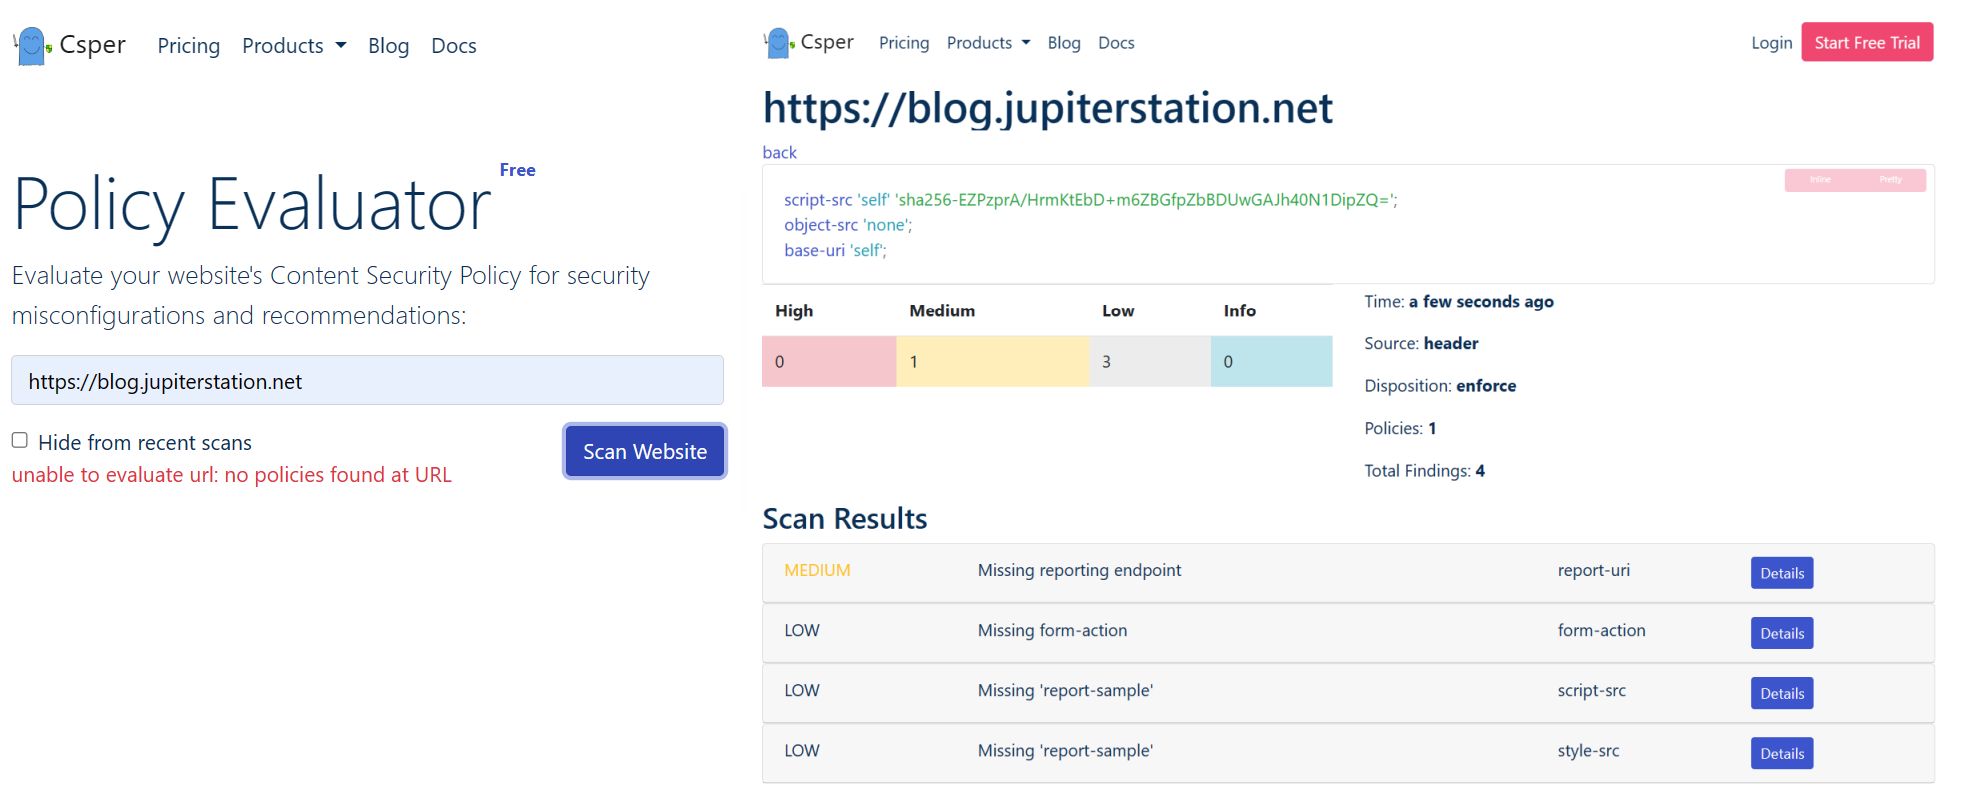
Before getting into any implementation details, let me provide some pretty before and after evidences on the multiple different online free no registration required sites that were used:
Configuring HTTPS
Seeing how this rabbit hole started with HTTPS I’ll begin here as well. Thanks to Let’s Encrypt certificates no longer have to cost an arm and a leg and the proof of ownership is handled by the industrious CertBot. The only doubt I had about the utilization of CertBot was whether to install it directly in the Raspberry Pi, install it in the nginx Docker container, or create a Docker container specifically for CertBot. In the end I decided to go with directly in the Raspberry Pi as the installation was simply via APT and did not have too many dependencies:
sudo apt install certbot
As the local machine does not have nginx installed I did not need the CertBot nginx plugin, I just needed to point it with the --webroot-path variable to where it could upload a proof of ownership file that is used during the generation of the certificate.
I added this section to the nginx config for the proof of ownership to work:
# Certbot validation root
location /.well-known/acme-challenge/ {
    root /usr/share/nginx/html/certbot;
}
And then fired the little industrious bot up to do its thing:
pi@ersa:/sd/pv/blog/content/certbot $ sudo certbot certonly --webroot
--webroot-path /sd/pv/blog/content/certbot/ --cert-path /sd/pv/blog/nginx-conf -d blog.jupiterstation.net
Saving debug log to /var/log/letsencrypt/letsencrypt.log
Plugins selected: Authenticator webroot, Installer None
Requesting a certificate for blog.jupiterstation.net
Performing the following challenges:
http-01 challenge for blog.jupiterstation.net
Using the webroot path /sd/pv/blog/content/certbot for all unmatched domains.
Waiting for verification...
Cleaning up challenges

IMPORTANT NOTES:
- Congratulations! Your certificate and chain have been saved at:
/sd/pv/blog/nginx-conf/fullchain.pem
Your key file has been saved at:
/sd/pv/blog/nginx-conf/privkey.pem
Your certificate will expire on 2023-10-29. To obtain a new or
tweaked version of this certificate in the future, simply run
certbot again. To non-interactively renew *all* of your
certificates, run "certbot renew"
- If you like Certbot, please consider supporting our work by:

Donating to ISRG / Let's Encrypt: https://letsencrypt.org/donate
Donating to EFF: https://eff.org/donate-le

pi@ersa:/sd/pv/blog/content/certbot $
Wow. that was easy!
I then modified the nginx config to force any HTTP connects to redirect to the HTTPS:
location / {
    return 301 https://blog.jupiterstation.net$request_uri;
}
and added a server on 443 utilizing the freshly minted certificates:
server {
    listen 443 ssl http2;
    listen [::]:443 ssl http2;

    server_name "blog.jupiterstation.net";

    ssl_certificate /etc/nginx/conf/fullchain.pem;
    ssl_certificate_key /etc/nginx/conf/privkey.pem;

    location / {
        root   /usr/share/nginx/html;
        index  index.html index.htm;
    }
}
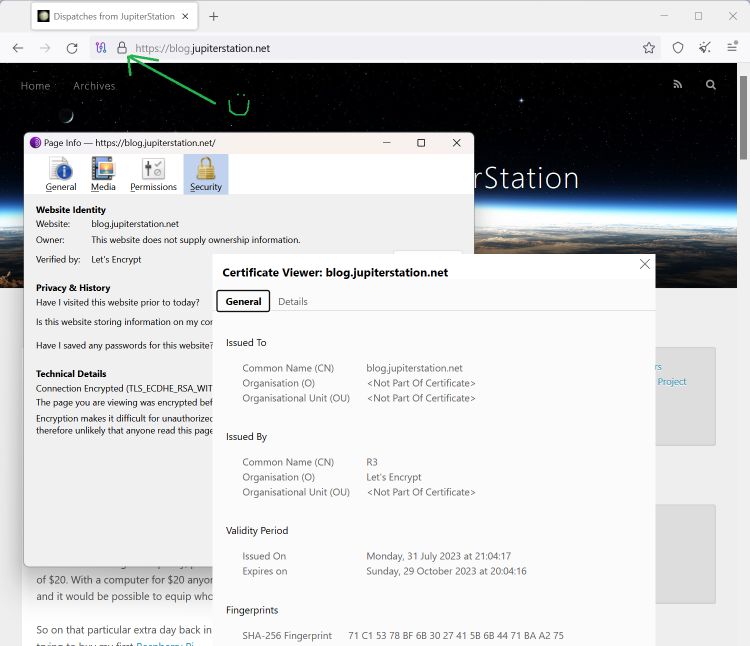
and crossing fingers I fire up Tor Browser and now have the little lock:
Fixing the reported risks and battening down the hatches
I only want nginx to serve up pages if the client is actually requesting blog.jupiterstation.net. To achieve that I added this as the default server to have nginx close the connection without sending any response to the client:
 server {
     return      444;  # A non-standard status code used to instruct nginx to close the connection without sending a response to the client, most commonly used to deny malicious or malformed requests.
 }
and testing the page without using the FQDN is see that works as advertised:
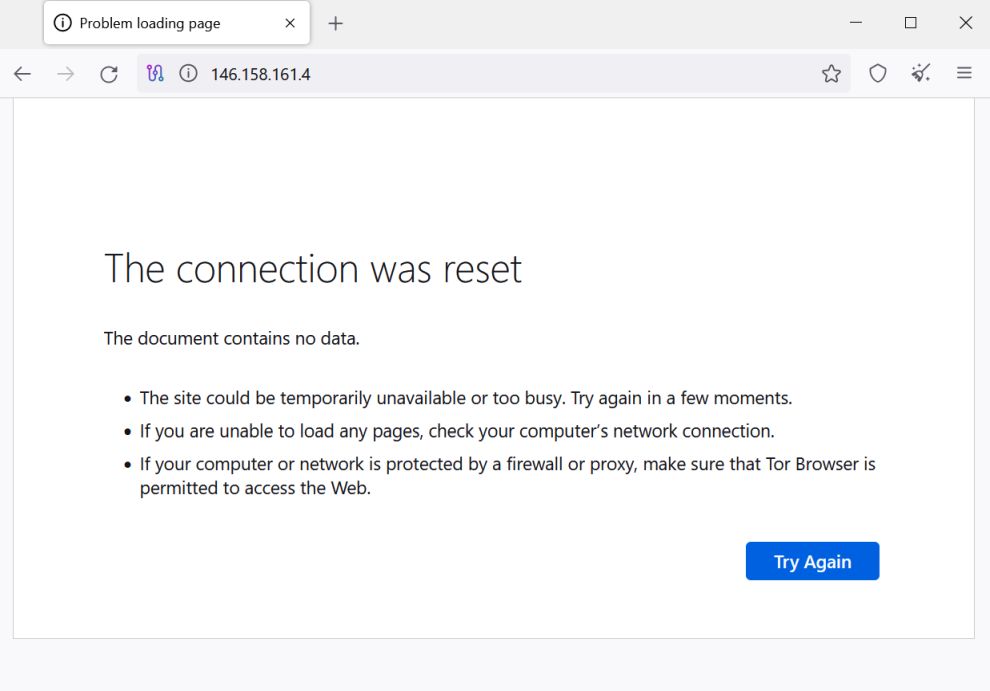
By default nginx spits out its version number which gives additional information that can be used by bad actors to help them find vulnerabilities to do mean things to my poor little nginx served blog. Ideally I would like to not even announce that nginx is involved but to do that I need to ‘nginx-extras’ which is not currently installed in the docker container so will have to wait until I can investigate and implement that. To remove the version from the signature it is a simple directive in the server section:
server_tokens off;
And finally I added the following headers to the nginx config that are an accumulations of different recommendations from the various scan reports:
 add_header Strict-Transport-Security "max-age=31536000; includeSubDomains" always;
 add_header X-XSS-Protection "1; mode=block";
 add_header Referrer-Policy "no-referrer";
 add_header X-Frame-Options "DENY";
 add_header X-Content-Type-Options nosniff;
 add_header Content-Security-Policy "script-src 'self' 'sha256-EZPzprA/HrmKtEbD+m6ZBGfpZbBDUwGAJh40N1DipZQ='; object-src 'none'; base-uri 'self';";
 add_header Permissions-Policy "geolocation=(),midi=(),sync-xhr=(),microphone=(),camera=(),magnetometer=(),gyroscope=(),fullscreen=(self),payment=()";
The trickiest of these was the Content Security Policy (CSP) that took quite a while of trial and error until I was finally able to get things to keep working and the scanners to be more or less happy with the results.
Cleaning up SSL involved setting three directives in the server section of HTTPS server and were copied from this site as fiddling with the individual ciphers to configure forward secrecy was beyond my capacities:
 ssl_protocols TLSv1.2 TLSv1.3;
 ssl_prefer_server_ciphers on;
 ssl_ciphers "EECDH+ECDSA+AESGCM EECDH+aRSA+AESGCM EECDH+ECDSA+SHA384 EECDH+ECDSA+SHA256 EECDH+aRSA+SHA384 EECDH+aRSA+SHA256 EECDH+aRSA+RC4 EECDH EDH+aRSA RC4 !aNULL !eNULL !LOW !3DES !MD5 !EXP !PSK !SRP !DSS +RC4 RC4";
Links, References and things that helped with this
- 14 Online Free Tools to Scan Website Security Vulnerabilities & Malware
- Content Security Policy (CSP)
- Google CSP Evaluator
- Enabling Perfect Forward Secrecy
- nmap command to enumerate ssl ciphers:
nmap --script ssl-enum-ciphers -p443 blog.jupiterstation.net - nginx command to test config syntax and verify everything is chachi piruli:
nginx -t - nginx command to reload config:
nginx -s reload
Thanks for reading and feel free to give feedback or comments via email (andrew@jupiterstation.net).
